Navigating the world of 3D printing can sometimes feel like uncharted territory. While the technology offers incredible creative and practical potential, encountering printing problems is a common part of the learning curve. When issues arise, knowing how to accurately diagnose the root cause is the first step to a successful resolution. This guide serves as your expert companion for 3d Printer Problem Diagnosis, walking you through common challenges and providing effective solutions to get your prints back on track. Whether you’re facing issues from filament not extruding at the start, prints not sticking to the bed, or more complex problems like layer shifting or infill issues, this comprehensive resource will empower you to troubleshoot like a pro.
Common 3D Printing Issues and Solutions
This troubleshooting guide is organized to help you quickly identify the problem you’re experiencing and find targeted solutions. We’ll cover a range of common 3D printing problems, from basic setup errors to more intricate material and hardware related issues.
Extrusion Issues
Problems related to filament extrusion are among the most frequent in 3D printing. These can manifest in various ways, impacting print quality and even causing print failures.
Not Extruding At The Start Of The Print
| Issue/Title | Not Extruding at the Start of the Print |
|---|---|
| Example Image / Graphic | |
| Issue Details | You observe grooves being etched into the print bed without any filament being deposited, or you see only sporadic, thin lines of filament appearing on the initial and subsequent layers. |
| Cause 1 | Incorrect Extruder Calibration/Offset: The nozzle might be too far from the print bed, preventing filament from properly adhering and extruding. |
| Suggested Solutions 1 | 1. Prime Extruder: Manually feed filament through the extruder until it flows smoothly from the nozzle before starting the print. 2. Adjust Nozzle Height: Fine-tune the distance between the nozzle and the bed. 3. Adjust First Layer Height: In your slicer settings, ensure the first layer height is appropriately configured. 4. Adjust Filament Extrusion Width: Check and adjust the extrusion width settings in your slicing software. 5. Babysteping/Z Offset: Utilize babysteping or Z offset adjustments during the first layer printing for real-time height correction. |
| Cause 2 | Clogged Extruder/Nozzle: A blockage in the nozzle or extruder path can prevent filament flow. |
| Suggested Solutions 2 | 1. Hobbed Gear Inspection: Check the hobbed gear for filament debris or wear that might be hindering filament feeding. 2. Clear Nozzle: Perform a nozzle cleaning procedure, either with a needle, cold pull, or by disassembling and cleaning the nozzle. |
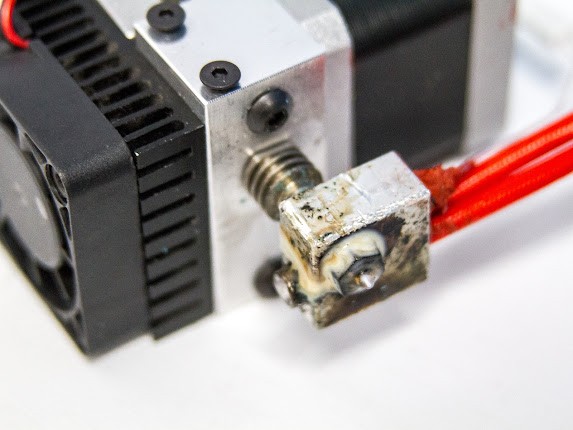
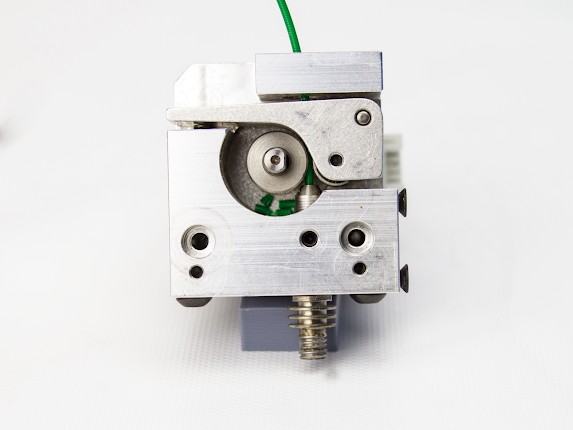
Jammed Nozzle / Clogged Extruder
| Issue/Title | Jammed Nozzle / Clogged Extruder |
|---|---|
| Example Image / Graphic | |
| Issue Details | The extruder struggles to push filament through the nozzle. This is often accompanied by a grinding or clicking sound emanating from the extruder motor as it slips on the filament. |
| Cause 1 | Heat Creep (PLA): PLA filament can soften and expand prematurely due to heat traveling up the hot end, creating a blockage. |
| Suggested Solutions 1 | 1. Manually Push Filament: Gently try to push filament through the extruder to dislodge any soft blockage. 2. Reload Filament: Remove and reload the filament; this might help clear a minor jam. 3. Cool and Reheat Extruder: Allow the extruder to cool down, then reheat it to printing temperature, which can sometimes resolve heat creep issues. |
| Cause 2 | Particle or Carbonized Filament Blockage: Debris or burnt filament residue can accumulate in the nozzle, causing a clog. |
| Suggested Solutions 2 | 1. Needle Clearing: Use a small diameter needle (like an acupuncture needle) to carefully clear the nozzle opening. 2. Nylon Cold Pull: Perform a cold pull (atomic pull) using nylon filament to remove stubborn clogs. 3. Disassemble and Clean: Disassemble the extruder and nozzle assembly for a thorough cleaning. 4. Unclogging Nozzle Guide: Consult online resources and guides specifically for unclogging 3D printer nozzles for detailed instructions. |
Under Extrusion
| Issue/Title | Under Extrusion |
|---|---|
| Example Image / Graphic | |
| Issue Details | Under extrusion is characterized by a “silky” or sparse appearance in the printed layers, often with visible gaps between extrusion lines and weakened layer adhesion. |
| Cause 1 | Incorrect Filament Diameter Setting: The slicer might be configured for a different filament diameter than what you are actually using (e.g., set for 3.00mm when using 1.75mm). |
| Suggested Solutions 1 | 1. Measure Filament Diameter: Accurately measure your filament diameter with calipers. 2. Adjust Filament Diameter Setting: Update the filament diameter setting in your slicer software to match your filament. 3. Extrusion Multiplier Adjustment: Fine-tune the extrusion multiplier in your slicer to compensate for minor variations in filament diameter or extruder output. 4. Machine Compatibility: Ensure your printer is compatible with the filament diameter you are using (some machines are designed for 2.85mm filament instead of 3.00mm, for example). |
| Cause 2 | Filament Extrusion Temperature Too Low: Printing at too low a temperature can make the filament too viscous to extrude properly. |
| Suggested Solutions 2 | 1. Increase Extruder Temperature: Raise the extruder temperature in small increments (e.g., 5-10°C) and test print until under extrusion is resolved. |
| Cause 3 | Nozzle or Extruder Clog or Calibration Issues: Partial nozzle clogs or improper extruder calibration can restrict filament flow. |
| Suggested Solutions 3 | 1. Clear Filament Path: Check for any obstructions or tight bends in the filament path that could be hindering feeding. 2. Clear Nozzle/Extruder: Perform nozzle cleaning procedures to eliminate any potential blockages. 3. Calibrate Extruder: Calibrate your extruder’s E-steps to ensure it’s extruding the correct amount of filament. |
Stops Extruding in the Middle of a Print
| Issue/Title | Stops Extruding in the Middle of a Print |
|---|---|
| Example Image / Graphic | |
| Issue Details | The 3D printer suddenly ceases to extrude filament during the printing process, leading to incomplete prints with missing layers from the point of stoppage upwards. |
| Cause 1 | Filament Feed Issues and/or Extruder Hardware Problems: This can range from simple filament runout to more complex hardware malfunctions. |
| Suggested Solutions 1 | 1. Out of Filament: Check if the filament spool has run out and replace it if necessary. 2. Filament Tangle: Inspect the filament spool for tangles that might be preventing smooth feeding. 3. Stripped Filament: Examine the filament for signs of stripping or grinding by the extruder gears; if stripped, reload the filament. 4. Nozzle Jam: A nozzle jam that develops mid-print can halt extrusion; attempt to clear the nozzle. 5. Heat Creep: Heat creep can lead to jams during longer prints; consider improving hot end cooling. |
Grinding Filament and/or Extruder Motor Skipping
| Issue/Title | Grinding Filament and/or Extruder Motor Skipping |
|---|---|
| Example Image / Graphic | |
| Issue Details | You hear unusual noises from the extruder motor, such as grinding or clicking sounds, indicating the motor is slipping or unable to properly grip and feed the filament. |
| Cause 1 | Heat Creep: Heat buildup in the extruder can cause the filament to soften and form a bulbous section just above the nozzle, obstructing movement. |
| Suggested Solutions 1 | 1. Filament Extrusion Check: Verify if filament is actually being extruded from the nozzle. 2. Increase Extruder Temperature: Slightly increase the extruder temperature to facilitate smoother filament flow. 3. Clear Nozzle Jam: Rule out a nozzle jam as the cause by attempting to clear any potential blockages. 4. Extruder Motor/Hobbed Gear Inspection: Check the extruder motor and hobbed gear for accumulated filament debris that might be causing slippage. |
Bed Adhesion Issues
Ensuring your 3D print reliably sticks to the bed is crucial for print success, especially in the early stages of the print.
Print Not Sticking To Bed
| Issue/Title | Print Not Sticking to Bed |
|---|---|
| Example Image / Graphic | |
| Issue Details | The printed object fails to adhere properly to the print bed, often detaching during the initial layers or later in the print. |
| Cause 1 | Bed Not Level: An uneven print bed is a primary cause of poor adhesion, as the nozzle-bed distance varies across the print surface. |
| Suggested Solutions 1 | 1. Level Bed: Perform thorough bed leveling using your printer’s leveling system (manual or auto-leveling). 2. Reduce First Layer Speed: Slowing down the print speed for the first layer can improve adhesion. |
| Cause 2 | Incorrect Nozzle Calibration/Offset: If the nozzle is too high above the bed, the filament won’t be properly squished onto the surface. |
| Suggested Solutions 2 | 1. Adjust Nozzle Height: Lower the nozzle closer to the bed. 2. Adjust First Layer Height: Modify the first layer height setting in your slicer. 3. Babystep for First Layer: Use babystep or Z-offset adjustments during the first layer to dial in the perfect nozzle height in real-time. |
| Cause 3 | Improper Bed Surface/Settings: The bed surface material or temperature might not be suitable for the filament being used. |
| Suggested Solutions 3 | 1. Change Bed Surface: Experiment with different bed surfaces like glass, tape, or BuildTak. 2. Use Adhesives: Apply bed adhesion aids such as tape, glue stick, or hairspray. 3. Adjust Bed Temperature: For certain materials like ABS, adjusting the bed temperature can significantly improve adhesion. 4. Adjust Extrusion Temperature: Optimize the extrusion temperature for better layer bonding and bed adhesion. 5. Raft or Brim: Utilize raft or brim features in your slicer to increase the surface area contact with the bed. |
Warping or Corner Lifting
| Issue/Title | Warping or Corner Lifting |
|---|---|
| Example Image / Graphic | |
| Issue Details | The edges or corners of the print, especially near the base, lift upwards from the print bed, causing a warped or uneven bottom surface. |
| Cause 1 | Material Shrinkage (e.g., ABS, Nylon): Materials like ABS and Nylon are prone to shrinking as they cool, which can induce warping forces. |
| Suggested Solutions 1 | 1. Level Bed: Ensure the print bed is perfectly level. 2. Adhesives on Glass: Use strong adhesives like specialized glue sticks or ABS slurry (“juice”) on glass beds. 3. Specialized Surfaces: Employ bed surfaces designed for warp-prone materials like BuildTak or WolfBite. 4. Babystep First Layer: Optimize first layer adhesion with babysteping. 5. Enclosure: Print within an enclosure to maintain a warm, stable ambient temperature and reduce cooling rates. 6. Avoid Air Vents: Keep the printer away from drafts and air conditioning vents. |
| Cause 2 | Part Design: Designs with sharp corners or thin, extended areas are more susceptible to warping. |
| Suggested Solutions 2 | 1. Level Bed: A level bed is crucial in all cases. 2. Babystep First Layer: Fine-tune first layer adhesion. 3. Lily Pads: Design “lily pads” – thin, wide circular or rectangular bases – under sharp corners in your 3D model to increase bed contact area. |
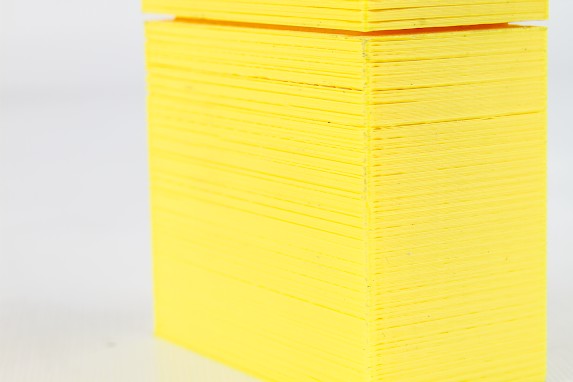
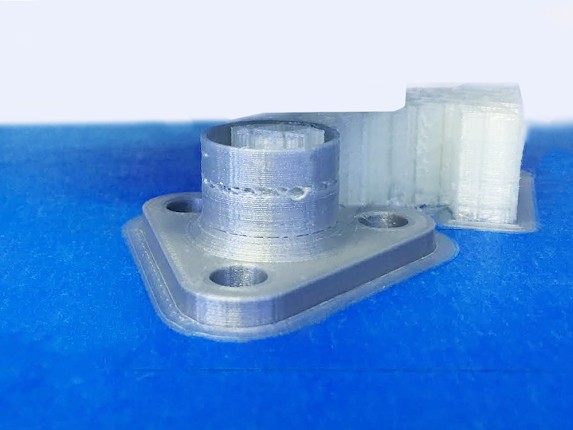
Smashed First Layer / Elephant’s Foot
| Issue/Title | Smashed First Layer / Elephant’s Foot |
|---|---|
| Example Image / Graphic | |
| Issue Details | The bottom-most layer of the print appears squashed or bulging outwards, creating a wider base than intended – often referred to as “elephant’s foot.” |
| Cause 1 | Bed Not Level: If the bed is not level, some areas might be too close to the nozzle, causing excessive squishing on the first layer. |
| Suggested Solutions 1 | 1. Level Bed: Precisely level the print bed. |
| Cause 2 | First Layer Height Too Low: Setting an excessively low first layer height forces the initial layer to be overly compressed. |
| Suggested Solutions 2 | 1. Increase First Layer Height: Increase the first layer height setting in your slicer. 2. Height Adjustment Balance: Find the right balance between good bed adhesion and avoiding elephant’s foot by carefully adjusting first layer height. |
| Cause 3 | Excessive First Layer Extrusion Rate: An extrusion rate for the first layer set above 100% can lead to over-extrusion and squashing. |
| Suggested Solutions 3 | 1. Adjust First Layer Extrusion Rate: Reduce the first layer extrusion rate in your slicer settings to 100% or slightly less. 2. Chamfer Design: Incorporate a chamfer (angled edge) into the bottom of your 3D model design to mitigate the visual effect of elephant’s foot. |
Layering and Structural Issues
These problems affect the overall structural integrity and dimensional accuracy of your 3D prints.
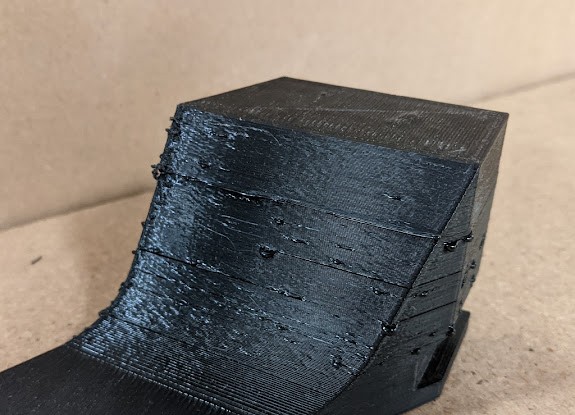
Layer Separation or Warping Within The Part
| Issue/Title | Layer Separation or Warping Within The Part |
|---|---|
| Example Image / Graphic | |
| Issue Details | Layers of the print fail to properly bond to each other, leading to visible separation or warping not just at the base, but throughout the height of the print. |
| Cause 1 | Print Temperature Too Low: Insufficient print temperature can result in poor interlayer adhesion. |
| Suggested Solutions 1 | 1. Increase Print Temperature: Gradually increase the print temperature to improve layer bonding. |
| Cause 2 | Excessive Layer Cooling: Too much cooling, especially during layer deposition, can hinder layer adhesion. |
| Suggested Solutions 2 | 1. Reduce/Disable Layer Cooling: Decrease fan speed or disable layer cooling fans, particularly for materials like ABS that benefit from less cooling. |
| Cause 3 | Cold/Uneven Ambient Air Temperature: Inconsistent or cold ambient temperatures can cause uneven cooling and warping. |
| Suggested Solutions 3 | 1. Enclosure Use: Use an enclosure to create a stable, warmer printing environment. |
| Cause 4 | Excessive Print Speed: Printing too fast can reduce the time available for layers to bond properly. |
| Suggested Solutions 4 | 1. Decrease Print Speed: Reduce the overall print speed to enhance layer adhesion. |
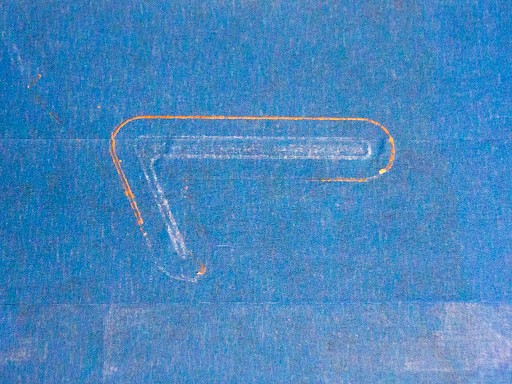
Shifted Layers or Leaning Prints
| Issue/Title | Shifted Layers or Leaning Prints |
|---|---|
| Example Image / Graphic | |
| Issue Details | Layers are noticeably displaced horizontally, creating a “shifted” appearance in the Z-direction as the print progresses, or the entire print leans in one direction. |
| Cause 1 | Excessive Print Speed: High printing speeds can induce vibrations and missed steps in the stepper motors. |
| Suggested Solutions 1 | 1. Lower Printing Speed: Reduce the print speed to minimize vibrations and ensure accurate motor movements. |
| Cause 2 | Nozzle Catching on Print: The nozzle might be colliding with slightly raised or warped areas of the print, causing layer shifts. |
| Suggested Solutions 2 | 1. Increase Z-Lift: Enable Z-lift (also known as Z-hop) and set a small positive value (e.g., 1mm or about 5 layers) to lift the nozzle slightly during travel moves. |
| Cause 3 | Loose Pulleys: Loose pulleys on the X or Y axes can cause backlash and layer shifts. |
| Suggested Solutions 3 | 1. Pulley Inspection/Tightening: Check all pulleys on the X and Y axes for looseness and tighten any that have play. 2. Friction Check: Ensure pulleys are rotating freely without excessive friction. |
| Cause 4 | Skipping Belts: Belts that are too loose or encountering excessive friction may skip teeth, leading to layer shifts. |
| Suggested Solutions 4 | 1. Axis Friction Check: Inspect the X and Y axes for any mechanical friction that might be impeding movement. 2. Belt Tension Adjustment: Check belt tension and adjust tension screws to ensure proper tightness (belts should be taut but not over-tightened). 3. Belt/Pulley Maintenance Guide: Refer to online resources for detailed guides on diagnosing and fixing shifted layers related to belts and pulleys. |
Surface Finish and Detail Issues
These problems manifest as imperfections on the surface of your prints, affecting aesthetics and dimensional accuracy of fine details.
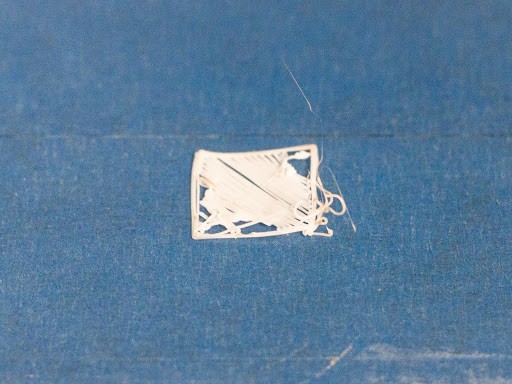
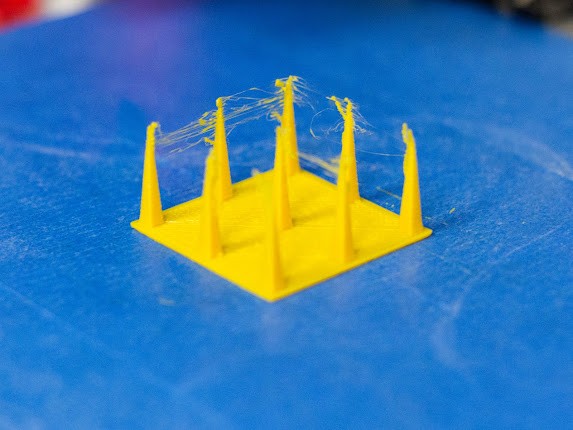
Stringing / Hairy Prints
| Issue/Title | Stringing / Hairy Prints |
|---|---|
| Example Image / Graphic | |
| Issue Details | Thin strands of filament, resembling hairs or strings, are left behind between different parts of the print or across open spaces. |
| Cause 1 | Slow Extruder Movement: Slow travel moves between print sections give molten filament more time to ooze from the nozzle. |
| Suggested Solutions 1 | 1. Retraction Calibration: Calibrate retraction settings to pull filament back efficiently during travel moves. 2. Increase Travel Speed: Increase the extruder’s travel speed for non-printing movements. 3. Retraction Guide: Consult online guides and articles on optimizing retraction settings to minimize stringing. 4. Retraction Test Prints: Download and print retraction test models (like retraction cubes) to fine-tune retraction parameters. |
| Cause 2 | Insufficient Retraction Length: If the filament isn’t retracted far enough, it can still ooze during travel moves. |
| Suggested Solutions 2 | 1. Retraction Calibration: Recalibrate retraction settings. 2. Increase Retraction Distance: Increase the retraction distance in small increments. 3. Retraction Guides/Tests: Again, utilize retraction guides and test prints. |
| Cause 3 | Printing with PETG: PETG filament is naturally more prone to stringing than PLA. |
| Suggested Solutions 3 | 1. Dry Filament: Ensure PETG filament is dry, as moisture can exacerbate stringing. 2. Adjust Extruder Temperature: Optimize extruder temperature for PETG; often slightly lower temperatures reduce stringing. |
| Cause 4 | “Combing” or “No Skin” Mode: If the slicer is set to cross gaps without retraction (e.g., “Combing Mode” or “No Skin” in Cura), stringing is more likely. |
| Suggested Solutions 4 | 1. Disable Combing/No Skin: Disable these settings in your slicer to force retraction moves over gaps. |
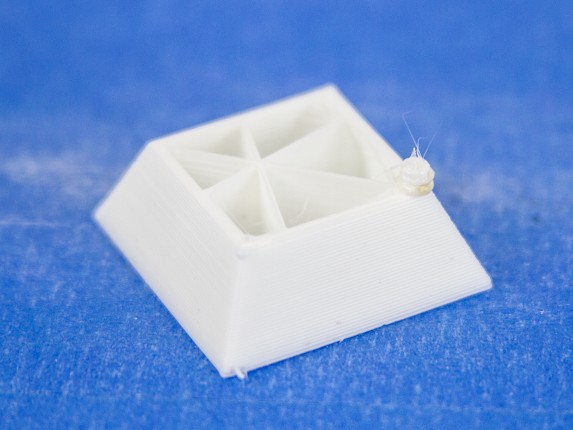
Blobs and/or Pimples on Exterior Surface
| Issue/Title | Blobs and/or Pimples on Exterior Surface |
|---|---|
| Example Image / Graphic | |
| Issue Details | Small, unwanted bumps or protrusions, often referred to as blobs or pimples, appear on the outer surface of the print, disrupting the smooth finish. |
| Cause 1 | Incorrect Retraction Settings/Temperature Fluctuations: Inconsistent retraction or temperature variations can cause excess filament to ooze or build up at certain points. |
| Suggested Solutions 1 | 1. Clean Nozzle: Ensure the nozzle is clean and free of any accumulated material. 2. Adjust Retraction: Fine-tune retraction length and speed settings. 3. USB Connection Check: If printing via USB, a poor connection can sometimes cause data flow issues leading to blobs; try printing from SD card. 4. SD Card Printing: Printing from an SD card can eliminate potential USB communication issues and improve print consistency. |
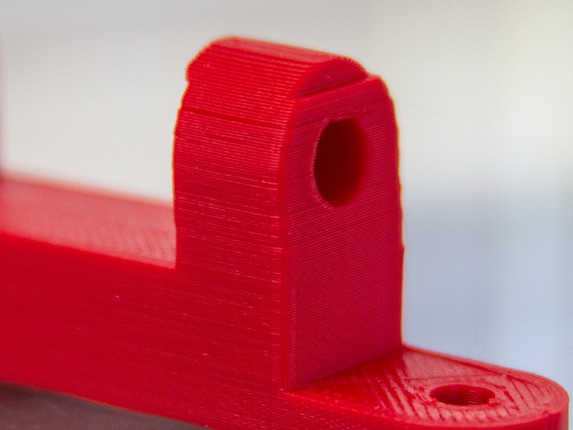
Scars on Top Surface
| Issue/Title | Scars on Top Surface |
|---|---|
| Example Image / Graphic | |
| Issue Details | Visible marks or scratches appear on the top surface of the print, often caused by the nozzle dragging across the surface during travel moves. |
| Cause 1 | Lack of Z-Lift/Retraction: Insufficient or no Z-lift or retraction during travel moves allows the nozzle to remain too close to the printed surface. |
| Suggested Solutions 1 | 1. Increase Z-Lift: Enable and increase the Z-lift (Z-hop) distance to lift the nozzle higher during travel moves, preventing it from dragging on the print surface. |
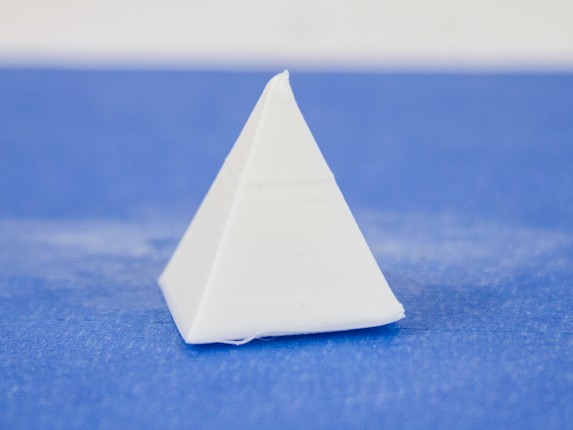
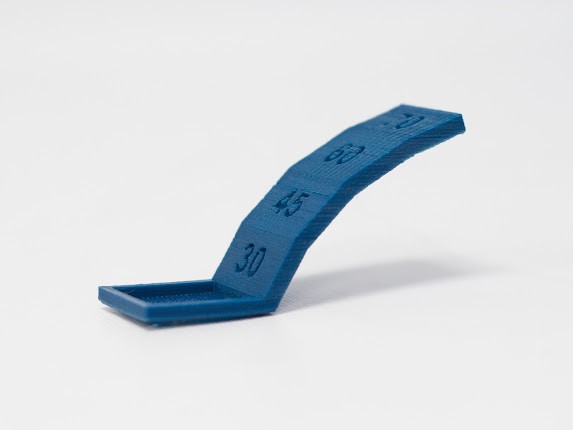
Overhangs or Sagging Sections in the Print
| Issue/Title | Overhangs or Sagging Sections in the Print |
|---|---|
| Example Image / Graphic | |
| Issue Details | Unsupported or protruding parts of the model, known as overhangs, may droop, sag, or print poorly due to lack of underlying support. |
| Cause 1 | Model Design/Orientation: The inherent design of the model or its orientation on the build plate may include steep overhangs that exceed the printer’s bridging capability. |
| Suggested Solutions 1 | 1. Add Supports: Enable support material generation in your slicer to provide temporary support structures under overhangs. 2. Reduce Layer Height: Smaller layer heights can improve overhang quality by providing finer steps for each layer to build upon. 3. Slow Print Speed: Printing overhangs at a slower speed allows for better cooling and adhesion. 4. Reposition Model: Reorient the model on the build plate to reduce the severity of overhangs. 5. 45-Degree Rule: As a rule of thumb, try to keep overhang angles at or below 45 degrees for best results without supports (depending on material and printer capabilities). |
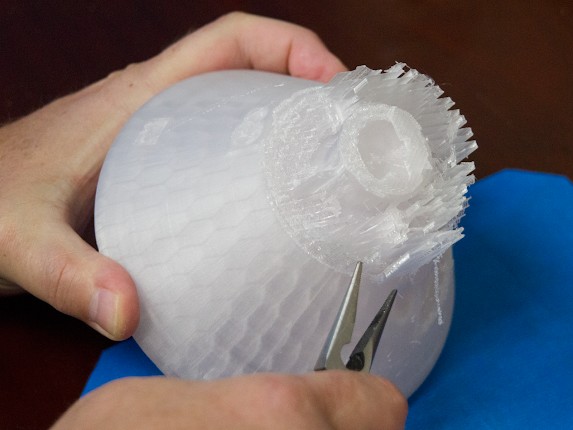
Support Material Difficult to Remove
| Issue/Title | Support Material Difficult to Remove |
|---|---|
| Example Image / Graphic | |
| Issue Details | Support structures are excessively difficult to detach from the printed part, often fusing with the part’s surface and leaving behind pitted or damaged areas after removal. |
| Cause 1 | Zero Gap/Layer Height Offset: Insufficient or no vertical gap between support layers and the supported part layers leads to strong bonding. |
| Suggested Solutions 1 | 1. Increase Air Gap: Increase the support air gap distance in your slicer settings (the vertical separation between supports and the part). 2. Increase Pattern Spacing: Increase the spacing between support lines or grid elements. 3. Decrease Support Percentage: Reduce the overall density of the support structure. 4. Disable Support Perimeters: Turn off perimeter lines for support structures, which can reduce contact area with the part. |
Infill Issues
Problems related to infill affect the internal structure and strength of your 3D prints.
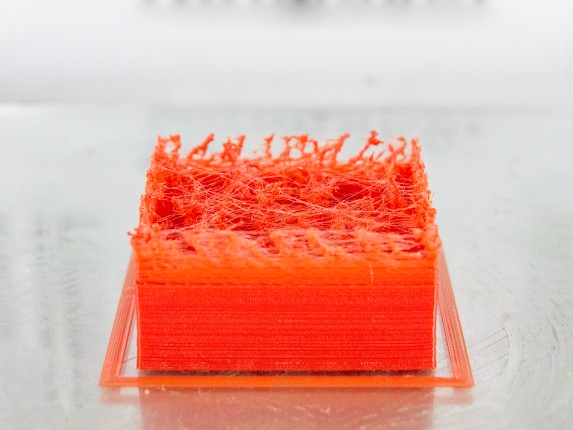
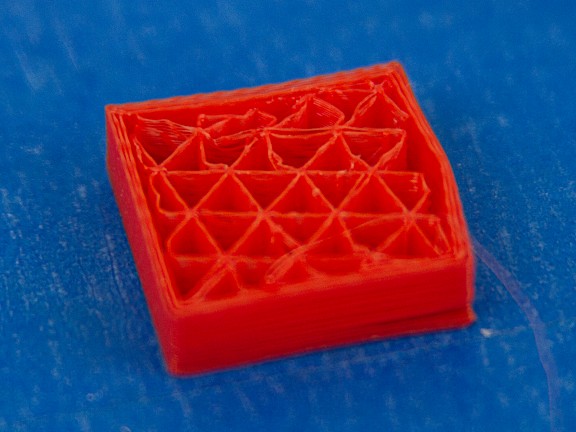
Weak Infill
| Issue/Title | Weak Infill |
|---|---|
| Example Image / Graphic | |
| Issue Details | The internal infill structure of the print is weak, sparse, or not fully formed, resulting in a print that is flimsy and lacks structural strength. |
| Cause 1 | Incorrect Infill Settings/Low Print Temperature: Inadequate infill density settings or printing at too low a temperature can lead to weak infill. |
| Suggested Solutions 1 | 1. Change Infill Pattern: Experiment with different infill patterns; some patterns are inherently stronger than others (e.g., gyroid, cubic). 2. Lower Print Speed: Reduce print speed for infill to improve extrusion consistency and bonding. 3. Increase Infill Extrusion Width: Increase the infill extrusion width setting to lay down thicker infill lines. |
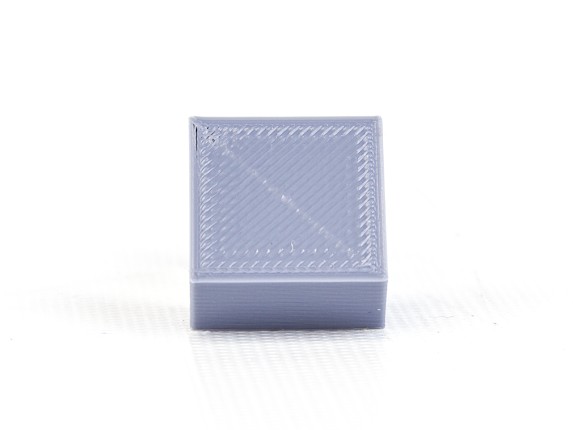
Infill Showing on Exterior of Print
| Issue/Title | Infill Showing on Exterior of Print |
|---|---|
| Example Image / Graphic | |
| Issue Details | The infill pattern becomes visible through the outer walls, top, or bottom surfaces of the printed part. |
| Cause 1 | Insufficient Top/Bottom Layers (Top/Bottom Surfaces): If infill is visible on top or bottom surfaces, it’s usually due to too few solid top or bottom layers. |
| Suggested Solutions 1 | 1. Increase Surface Layers: Increase the number of top and bottom solid layers in your slicer settings. 2. Decrease Top Infill Speed: Reduce the print speed for top solid infill to improve surface finish. |
| Cause 2 | Insufficient Perimeters/Excessive Infill Overlap (Side Surfaces): Infill showing on side surfaces is often caused by too few perimeter walls or excessive infill overlap. |
| Suggested Solutions 2 | 1. Increase Perimeters: Increase the number of perimeter/wall lines to create thicker outer walls. 2. Reduce Infill Overlap: Decrease the infill overlap percentage to minimize infill protrusion into the perimeters. |
Pillowing (Incomplete Top Layer Fills)
| Issue/Title | Pillowing (Incomplete Top Layer Fills, Top Layer Holes/Gaps) |
|---|---|
| Example Image / Graphic | |
| Issue Details | The top surface of the print exhibits incomplete filling, resulting in gaps, holes, or a “pillowed” appearance, particularly noticeable with PLA. |
| Cause 1 | Rapid Layer Cooling (PLA): PLA, in particular, can suffer from pillowing if top layers cool too quickly before they can fully solidify and bridge gaps. |
| Suggested Solutions 1 | 1. Increase Top Layers: Increase the number of top solid layers to ensure complete coverage. 2. Increase Infill Density: A denser infill provides more support for the top layers. 3. Lower Top Layer Speed: Reduce the print speed specifically for solid top layers to allow more time for proper filling. |
Small Features Not Printed
| Issue/Title | Small Features Not Printed |
|---|---|
| Example Image / Graphic | |
| Issue Details | Fine details in the 3D model, such as sharp corners, thin walls, or intricate patterns, are not fully reproduced or are missing entirely in the final print. |
| Cause 1 | Feature Size Below Nozzle Extrusion Width: The most common reason is that the intended features are smaller than the width of the filament extruded by the nozzle. |
| Suggested Solutions 1 | 1. Enable Thin Wall Detection: Activate “thin wall detection” in your slicer (often called “Arachne” in Cura or PrusaSlicer). This feature optimizes toolpaths for printing walls thinner than the nozzle width. 2. Model Redesign: If possible, modify the 3D model source files to increase the thickness of thin walls and feature sizes to be more easily printable with your chosen nozzle. |
By methodically working through this 3D printer problem diagnosis guide, you can systematically identify and address the majority of common printing issues. Remember to adjust settings incrementally and test after each change to pinpoint the optimal solution for your specific problem.