Diagnosing car air conditioning issues can seem daunting, but with a systematic approach, you can pinpoint the problem effectively. This guide, tailored for auto repair professionals and enthusiasts at xentrydiagnosis.store, provides a comprehensive walkthrough for diagnosing common car AC problems, ensuring you can restore cool comfort for your customers or your own vehicle.
Understanding the Basics of Car AC Systems
Before diving into specific issues, let’s recap the fundamental components of a car air conditioning system. These include:
- Compressor: The heart of the system, responsible for circulating refrigerant.
- Condenser: Releases heat from the refrigerant, turning it into a liquid.
- Evaporator: Absorbs heat from the cabin air, cooling it down.
- Expansion Valve or Orifice Tube: Regulates refrigerant flow and pressure.
- Refrigerant: The working fluid that carries heat.
- Accumulator or Receiver/Drier: Removes moisture and contaminants from the refrigerant.
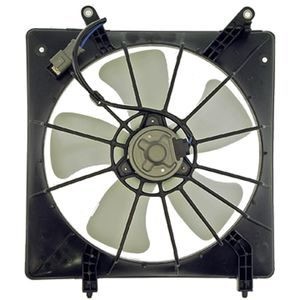
- Cooling Fans: Ensure airflow over the condenser, especially at low speeds.
Understanding how these components work together is crucial for effective diagnosis.
Step 1: Initial Checks – Is Your AC Cool, But Not Cold Enough?
If your customer complains that the AC is blowing cool but not truly cold air, start with these basic checks:
- Check the Cooling Fans: With the AC on maximum cool and fans at high, verify if the cooling fans on the condenser or radiator are running. These fans are essential for heat dissipation, especially when the car is stationary or moving slowly.
- Inspect for Obstructions: Examine the condenser and radiator for any obstructions like leaves, bugs, or debris that could restrict airflow. Blocked airflow reduces the condenser’s ability to cool the refrigerant.
- Cabin Air Filter: A clogged cabin air filter can significantly reduce airflow into the cabin and impact AC performance. Check and replace if necessary.
Beyond these visual checks, the next crucial step is to measure the system pressures using a manifold gauge set.
Step 2: Gauge the Pressure – Reading Manifold Gauges
Using a manifold gauge set is essential for diagnosing AC system issues. Refer to your vehicle’s repair manual or online resources to find the recommended high-side and low-side pressure readings for your specific model.
- Connect the Gauges: Properly connect the manifold gauge set to the high and low-pressure ports of the AC system.
- Observe Pressure Readings: With the engine running and AC on, note the high and low-side pressure readings. These readings provide vital clues about the system’s health.
Interpreting Pressure Readings:
- Low Refrigerant: If both high and low-side pressures are lower than specified, it usually indicates low refrigerant levels, often due to a leak.
- Overcharge: Excessively high readings on both sides could suggest overcharging or a blockage in the system.
- Compressor Issues: Abnormal readings, especially fluctuating or very low low-side pressure with normal high-side pressure, might point to a compressor problem.
- Expansion Valve/Orifice Tube Blockage: A very low low-side pressure and very high high-side pressure can indicate a blockage in the expansion valve or orifice tube.
Step 3: Focus on the AC Compressor – The Heart of the System
The AC compressor’s operation is critical. Here’s how to diagnose it:
- Compressor Clutch Engagement: With the engine running and AC on, check if the compressor clutch is engaging. This is the center part of the compressor pulley that should engage when the AC is activated.
- Intermittent Clutch Engagement: If the clutch engages and disengages rapidly (every few seconds), it strongly suggests low refrigerant. The system is cycling on and off due to insufficient refrigerant pressure. Observe the low-side gauge during this – it will drop sharply when the clutch engages and rise when it disengages.
- No Clutch Engagement: If the clutch is not engaging at all, even with refrigerant in the system (indicated by some pressure on the gauges), investigate further:
- Voltage Check: Use a voltmeter to check if voltage is reaching the compressor clutch.
- No Voltage: If no voltage is present, suspect issues like a blown fuse, a faulty cycling switch, or a low-pressure cutoff switch triggered by insufficient refrigerant.
- Voltage Present: If voltage is present, the compressor clutch itself might be faulty and require replacement.
Step 4: Leak Detection – The Most Common Culprit
Refrigerant leaks are the most frequent cause of AC problems. If your pressure readings indicate low refrigerant, leak detection is the next crucial step.
- UV Leak Detection Kit: The most effective method for locating leaks is using a UV leak detection kit. These kits typically include UV dye and a UV light.
Using a UV Leak Detection Kit:
- Introduce UV Dye: Follow the kit instructions to introduce UV dye into the AC system.
- Run the AC: Operate the AC system to circulate the dye.
- Inspect with UV Light: Use the UV light to inspect various system components for signs of dye leakage.
Key Areas to Check for Leaks:
- Fittings and Connections: Examine all refrigerant line fittings and connections for leaks. Ensure they are secure.
- Compressor Hose Manifolds: Check the points where hoses connect to the compressor.
- Compressor Front Seal and Pressure Switch O-rings: Inspect the compressor front seal and the O-rings around pressure switches, often located on the compressor back.
- Hose Crimp Fittings: Examine where hoses are crimped onto fittings.
- Schrader Valves: These valves can sometimes leak.
- Condenser: Carefully inspect the condenser for pinhole leaks, especially in areas exposed to road debris.
- Evaporator Drain: Check the evaporator drain for condensation. Traces of oil or UV dye in the drain can indicate an evaporator leak. Note: UV dye detection may not work if the system is severely depleted and the compressor isn’t cycling.
Step 5: Component Deep Dive – Addressing Specific Issues
If basic checks and leak detection don’t reveal the problem, delve deeper into individual components:
AC Compressor and Clutch
- Common Problems: Leaks from seals or the compressor body, internal wear and contamination, and clutch failure.
- Diagnosis: Look for visible oily, greenish residue indicating leaks. Check for clutch engagement issues and listen for unusual noises from the compressor. Electrical testing can confirm clutch functionality.
AC Accumulator/Drier
- Common Problems: Desiccant material breakdown and contamination of the system, leaks leading to desiccant saturation.
- Diagnosis: Internal failures are harder to detect directly but can be suspected if there’s system contamination. Leaks can be found using UV dye. A saturated drier can lead to system inefficiency and compressor damage.
AC Orifice Tube/Expansion Valve
- Common Problems: Blockages due to contamination.
- Diagnosis: Suspect a blockage if you observe high high-side pressure and low low-side pressure after verifying correct refrigerant charge and cooling fan operation. However, always rule out other simpler issues first.
AC Condenser
- Common Problems: Leaks, blockage from contaminants, and damage from road debris.
- Diagnosis: Visually inspect for damage and leaks. Check for airflow obstructions. Temperature differences across the condenser can indicate blockage.
AC Evaporator Core
- Common Problems: Leaks, often due to corrosion or wear over time.
- Diagnosis: Use an electronic leak detector at the evaporator drain. Oil or dye in the drain is a strong indicator of an evaporator leak.
Conclusion: Systematic Diagnosis is Key
Diagnosing car AC problems requires a logical, step-by-step approach. Start with basic checks, move to pressure readings, and then systematically investigate components based on your findings. By following this guide and utilizing the right tools, you can effectively diagnose and repair car air conditioning issues, ensuring customer satisfaction and your expertise in automotive AC repair. Remember to always consult vehicle-specific repair information and prioritize safety when working with refrigerant systems.