Experiencing a less-than-chilly breeze from your car’s AC vents? Before you rush to a mechanic, you might be able to diagnose the issue yourself. This guide will walk you through the steps of Diy Car Ac Diagnosis, helping you pinpoint common problems and potentially save on repair costs.
1. Is Your AC Cool, But Not Cold Enough?
If your AC is blowing air that’s cool but not truly cold, especially when set to maximum with the fans on high, there are a few simple checks you can perform:
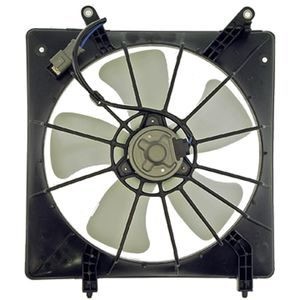
First, ensure the cooling fans on your condenser or radiator are operating when the AC is switched on. These fans are crucial for dissipating heat from the refrigerant.
Image: A car radiator cooling fan, essential for AC condenser heat dissipation.
Next, inspect the condenser, usually located in front of the radiator, for any obstructions. Leaves, bugs, or dirt can block airflow and reduce cooling efficiency. Clean any debris you find.
Another common culprit is a clogged cabin air filter. A restricted filter limits airflow into the cabin and can make the AC seem weak. Locate your cabin air filter (usually behind the glove box or under the hood) and check if it’s dirty. Replace it if necessary.
Beyond these basic checks, using a manifold gauge set to read the pressures within your AC system is the next logical step in diy car ac diagnosis. Your vehicle’s repair manual, or online resources specific to your car model, will provide the recommended high-side and low-side pressure readings. Once you have your gauges connected, observe the AC compressor’s behavior.
2. Starting Your Diagnosis with the AC Compressor
The AC compressor is the heart of your car’s air conditioning system, so it’s a good place to begin your diy car ac diagnosis.
With the engine running, turn your AC to maximum cool and the fans on high. Observe the AC compressor clutch. This is the center part of the compressor pulley that engages when the AC is turned on. It should engage, connecting the pulley to the compressor shaft.
If the clutch is rapidly engaging and disengaging every few seconds, this often indicates low refrigerant levels. You’ll likely see the low-side pressure on your gauge drop sharply when the clutch engages, only to disengage and see the pressure rise again. Adding refrigerant may resolve this issue and allow the compressor to run continuously at the correct pressure.
However, if the clutch isn’t engaging at all, even with refrigerant in the system, you’ll need to investigate further. Use a voltmeter to check if voltage is reaching the compressor.
- If voltage is present at the compressor, the clutch itself may be faulty and require replacement.
- If there’s no voltage, potential causes include a faulty cycling switch, a blown fuse, or insufficient refrigerant pressure preventing the low-pressure cutoff switch from allowing the compressor to engage. This switch is a safety mechanism to prevent compressor damage when refrigerant levels are too low.
3. Leaks: The Primary Cause of AC Problems
Refrigerant leaks are the most frequent reason for AC system malfunctions. If your system pressure is low, suspect a leak.
Image: A UV leak detection kit, a valuable tool for DIY car AC diagnosis.
A UV AC leak detection kit is the easiest and most effective tool for locating leaks. Follow the kit’s instructions to introduce UV dye into the AC system and then use a UV light to scan for leaks. The dye will glow brightly at leak points.
Carefully examine these areas for leaks:
- Fittings: Check all connections and fittings throughout the AC system to ensure they are secure.
- Compressor Hose Manifolds: Inspect the points where hoses connect to the compressor.
- Compressor Front Seal and O-rings: Examine the compressor’s front seal and the o-rings that seal pressure switches, particularly on the compressor’s back.
- Hose Crimp Fittings: Check where hoses are crimped onto their fittings for leaks.
- Schrader Valves: These valves, similar to tire valves, can sometimes leak.
- Condenser: Inspect the condenser for pinhole leaks.
- Evaporator Drain: Locate the evaporator drain tube, which expels condensation. Check this area with a UV light, as oil or dye may be visible if the evaporator core is leaking.
Important Note: The UV dye method won’t be effective if the system is critically low on refrigerant and the compressor isn’t cycling. You may need to add a small amount of refrigerant to allow the compressor to run briefly and circulate the dye.
Still Unsure? Inspect These Key AC Components
If you’re still struggling to pinpoint the problem with your diy car ac diagnosis, understanding the function and common issues of individual components can be helpful.
AC Compressor and Clutch
The AC compressor is essentially a pump that circulates refrigerant throughout the AC system.
Common Issues: Leaks from seals or the compressor body itself are common. Internal wear can lead to particle contamination within the system. The AC clutch, responsible for engaging the compressor, can also fail.
Signs to Look For: Low refrigerant, visible oily/green leaks, noises from the compressor area, or a non-engaging clutch. Always inspect fuses, wiring, and pressure switches before replacing the compressor.
AC Accumulator/Drier
The accumulator or receiver/drier removes moisture from the refrigerant. Moisture contamination is detrimental to the AC system.
Common Issues: Internal failure can release desiccant material into the system, causing blockages. Leaks can saturate the desiccant, reducing its effectiveness and potentially damaging the compressor.
AC Orifice Tube/Expansion Valve
These components regulate refrigerant flow and filter out debris. Your vehicle will have either an orifice tube or an expansion valve.
Common Issues: Contamination is the primary cause of failure. Incorrect system pressures (too high or too low) can indicate a problem. However, always verify refrigerant levels and cooling fan operation first.
AC Condenser
The condenser, resembling a radiator, cools hot refrigerant gas, turning it back into a liquid.
Image: A car AC condenser, responsible for cooling refrigerant.
Common Issues: Leaks and blockages due to contamination from other failing components. Inspect cooling fans while checking the condenser.
AC Evaporator Core
The evaporator core cools the cabin air. Air passes through it, and the blower motor distributes the chilled air through the vents.
Common Issues: Leaks due to age and corrosion are most common. Use an electronic leak detector, especially around the evaporator drain, to check for leaks. Oily residue in the drain can also indicate a leak.
By following these diy car ac diagnosis steps, you can systematically troubleshoot your car’s air conditioning issues. Remember to consult your vehicle’s repair manual for specific pressure readings and component locations. While DIY diagnosis is empowering, complex AC problems may require professional expertise.