 check engine light diagnosis using obd2 scanner
The sudden illumination of your car’s Check Engine Light (CEL) can be a moment of dread for any driver. This enigmatic dashboard indicator often triggers a cascade of questions and concerns: Is it a minor glitch, or a sign of serious engine trouble? Can I keep driving, or should I pull over immediately? And perhaps most pressingly, how much is this going to cost to fix? Understanding the nuances of Check Engine Light Diagnosis is crucial for every car owner to navigate these situations with confidence and avoid unnecessary stress.
This article aims to demystify the check engine light and equip you with the knowledge to effectively approach check engine light diagnosis. We will delve into what a CEL truly signifies, differentiate between serious and minor alerts, explore common culprits behind its activation, and guide you through practical steps for diagnosing and addressing the issue, empowering you to make informed decisions about your vehicle’s health.
Understanding the Check Engine Light (CEL): Your Car’s Warning System
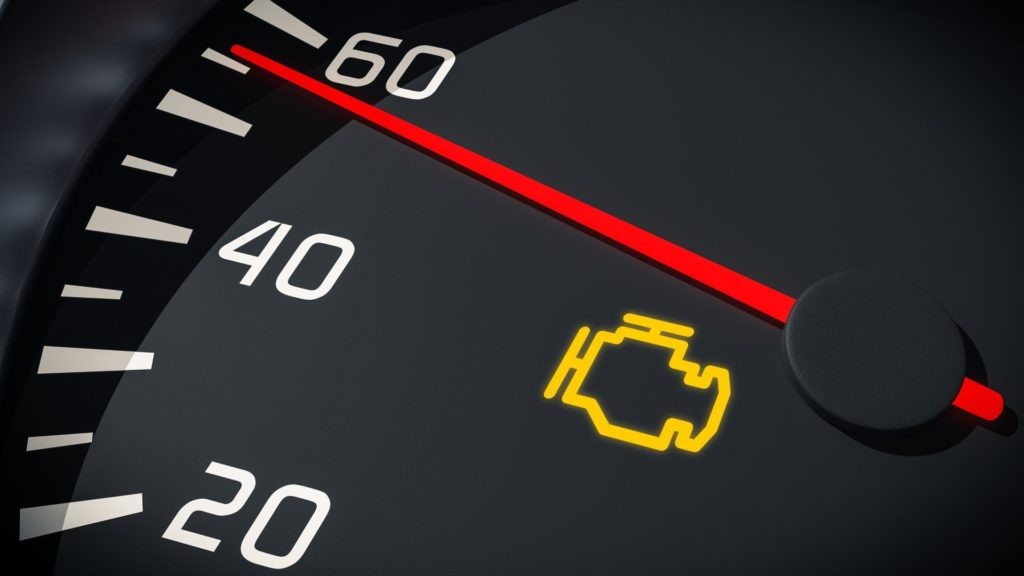
The Check Engine Light, technically known as a malfunction indicator lamp, is your vehicle’s way of communicating that its onboard computer has detected an anomaly. These warning lights, typically displayed in yellow, amber, or orange, may feature the words “Check Engine” or simply an engine icon. It’s essential to familiarize yourself with all of your vehicle’s indicator lights by consulting your owner’s manual, ensuring you can distinguish a CEL from routine maintenance reminders like “Service Req’d,” which are often mileage or time-based prompts for services such as oil changes.
The standardization of check engine light systems marked a significant advancement in automotive diagnostics. In 1996, regulations mandated that all auto manufacturers adopt a universal set of diagnostic trouble codes and a standardized interface for accessing the vehicle’s computer data. This led to the introduction of the OBD-II (On-Board Diagnostics II) system, characterized by a universal connector port usually located beneath the steering column for easy access. Before OBD-II, each manufacturer employed proprietary diagnostic systems, demanding specialized tools and expertise for check engine light diagnosis and repair.
Deciphering Your CEL: What Does it Mean When the Light Comes On?
When your Check Engine Light illuminates, it signifies that a sensor within your car’s intricate system has registered a reading outside of the predetermined normal operating range. This variance could stem from a trivial issue, such as a loosely fitted gas cap, or signal a more significant problem impacting engine performance or emissions control. Consider a CEL activation as a prompt to exercise caution, closely monitor your vehicle’s behavior, and promptly investigate the underlying cause. Ideally, a thorough check engine light diagnosis should be performed by a qualified mechanic to accurately pinpoint the issue.
Is it Serious? Differentiating Urgent vs. Non-Urgent CEL Issues
Determining the urgency of a Check Engine Light situation hinges primarily on whether the light is steady or flashing. A flashing CEL is a clear indicator of a potentially serious problem demanding immediate attention. This flashing signal often suggests conditions that could lead to engine damage or pose safety risks if ignored. Engine misfires, component failures within the engine, or exhaust system malfunctions are common causes of a flashing check engine light.
If you encounter a flashing CEL, prioritize safety. Pull over to a safe location as soon as possible, turn off the engine, and visually inspect your vehicle for any obvious signs of trouble, such as smoke, unusual noises, or fluid leaks. If no immediate issues are apparent and other gauges are reading normally, you can cautiously restart the car to see if the flashing persists. If the CEL continues to flash, it’s crucial to turn off the vehicle again and arrange for professional towing to prevent further damage.
Step-by-Step Check Engine Light Diagnosis: Finding the Root Cause
Once a Check Engine Light activates, the next crucial step is to perform a check engine light diagnosis by retrieving the stored diagnostic trouble codes from your car’s computer. The standardized OBD-II port, typically located under the steering column, serves as the access point for this process. You’ll need an OBD-II scanner, often referred to as a ‘reader,’ which plugs into this port. Most mechanics have scanners readily available for check engine light diagnosis, and many auto parts stores, like AutoZone, often offer free code scanning services. For DIY enthusiasts, purchasing a personal OBD-II scanner is a worthwhile investment, with many modern scanners offering Bluetooth connectivity and smartphone app integration for enhanced convenience.
To initiate check engine light diagnosis, connect the OBD-II scanner to the port, turn your vehicle to the ‘on’ position (without starting the engine unless instructed by the scanner), and follow the device’s prompts to read trouble codes. The scanner will communicate with your car’s computer, retrieve the diagnostic information, and present you with standardized codes, such as “P0420.” While these codes provide a general indication of the affected system or symptom, pinpointing the precise cause often requires further investigation. You’ll likely need to research the specific code in relation to your vehicle’s year, make, and model online or consult with a mechanic to identify the most probable causes for accurate check engine light diagnosis.
At this juncture, many car owners prefer to entrust their vehicle to professional mechanics for comprehensive check engine light diagnosis and repair. However, for those inclined towards DIY car maintenance, addressing minor issues independently can be a quicker and more cost-effective solution. An OBD-II reader empowers car owners with valuable information, facilitating informed discussions with mechanics and potentially preventing unnecessary or expensive repairs.
Navigating Diagnostic Nuances: Mixed Signals and Information Depth
It’s important to understand that even with a specific trouble code obtained through check engine light diagnosis, you don’t necessarily have a definitive answer to the underlying problem. These codes serve as valuable starting points, guiding your investigation towards the affected system. Occasionally, a code might be triggered by a different component than what the code description directly suggests, highlighting the complexity of check engine light diagnosis.
Certain vehicle manufacturers utilize proprietary diagnostic tools that offer more in-depth information compared to universal OBD-II scanners, particularly in newer models. If standard check engine light diagnosis with a universal scanner yields inconclusive results, seeking assistance from a specialized mechanic or dealership equipped with manufacturer-specific tools can be beneficial.
In some instances, the check engine light may illuminate intermittently without any actual underlying fault. Transient factors like fluctuations in humidity or sensor sensitivity can trigger false alarms. In such cases, the light typically extinguishes on its own after a short period as the system recalibrates.
Resetting Your Check Engine Light: Temporary Solution, Not a Fix
Most OBD-II scanners provide the functionality to turn off or reset the check engine light. However, it is critical to recognize that this action merely clears the symptom (the illuminated light) and does not rectify the underlying issue triggering the CEL. In most scenarios, the check engine light will reappear after a certain driving period or distance if the problem persists. Alternatively, the light will automatically turn off once the necessary repair is completed and the vehicle has been driven sufficiently for the computer to re-run and pass the relevant diagnostic tests. The time or mileage required for this self-clearing process varies depending on the nature of the problem and the specific vehicle’s diagnostic protocols.
Common Culprits: Top Reasons for Check Engine Light Activation
CarMD, a reputable automotive telematics company, published a revealing list of the 10 most common check engine codes in 2018, offering valuable insights into prevalent causes for CEL activation:
- Oxygen (O2) Sensor Replacement
- Ignition Coil and Spark Plug Replacement
- Catalytic Converter Replacement
- Fuel Cap Inspection and Tightening/Replacement
- Evaporative Emissions (EVAP) Purge Solenoid Replacement
- Mass Air Flow (MAF) Sensor Replacement
- Ignition Coil Replacement (Redundant in the top 10, highlighting frequency)
- Evaporative Emissions (EVAP) Purge Solenoid Replacement (Redundant, highlighting frequency)
- Fuel Injector Replacement
- Thermostat Replacement
It’s almost become an automotive adage, but one of the first and simplest steps in check engine light diagnosis when a steady CEL appears is to verify that your gas cap is securely tightened. A loose gas cap creates a leak in the vehicle’s evaporative emissions control system, triggering an error signal to the car’s computer. If a loose fuel cap is indeed the culprit, simply tighten it properly and continue driving. It may take some time for the system to complete its diagnostic cycle and confirm the ‘fix’, but hopefully, the light will then extinguish on its own.
A Word of Caution: Heed the CEL Warning
It’s understandable that the check engine light can induce anxiety and worry. Some drivers might be tempted to ignore the warning altogether, perhaps even resorting to covering the light with tape to avoid seeing it. However, it’s crucial to emphasize that neglecting a Check Engine Light is ill-advised. The underlying issue is unlikely to resolve itself and ignoring it significantly increases the risk of more extensive damage and costlier repairs down the line. A calm, logical, and proactive approach to check engine light diagnosis is always the most prudent course of action.
Drivers of older vehicles might be tempted to postpone maintenance in an attempt to maximize their vehicle’s lifespan before seeking professional service. While seemingly a cost-saving strategy in the short term, this approach often backfires, leading to more severe problems and expensive repairs in the long run.
Furthermore, the frequency of check engine light activations can serve as a general indicator of your vehicle’s overall health. If warning lights are becoming increasingly common, it might signal that various components are nearing the end of their service life. In such cases, it’s wise to become more diligent with your vehicle’s service intervals and routine inspections to proactively address potential issues and maintain its long-term reliability.